How to “BULLETPROOF” your hamstrings…

I know, slight click bait, but a dodgy hammy can be a real hindrance to you enjoying your sport. I’ve felt the pain, having been on the wrong end of a decent hamstring tear and continuing to push too hard thinking I knew best. Great therapists are typically terrible patients. Or at least that’s what I keep telling myself.

Here’s where I recommend would be a good place to start to get on top of your hamstring niggles. To make things simple, I’ll be talking mostly through my preferred exercises to be included in hamstring rehab through the different stages of injury.

Remember, this blog is general information based on personal experience and my thoughts of where to start. Everyone is different, and every injury is different. It is best practice to seek out a physiotherapist to personally guide your treatment.

Settle Grettle Phase (Day 1-5, or 14 if you’re unlucky)

During the acute phase, there’s a possibility that you will have a small to large tear/multiple tears through the hamstring muscle, musculotendinous junction or tendon to bone insertion or origin. With this in mind, it is imperative you resist the urge to really stretch through the hamstring, and instead, start to get tolerable load through the hamstring early. In my opinion, this helps to promote the “knitting” of the soft tissue for good healing.

Personally, my favourite exercise is the prone self resisted hamstring holds in the mid-range. Hold for 5-10 seconds against as much resistance you can manage without sharp pain or the hamstring “giving out”. Repeat for 10 repetitions twice daily
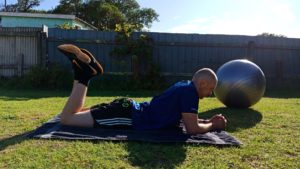
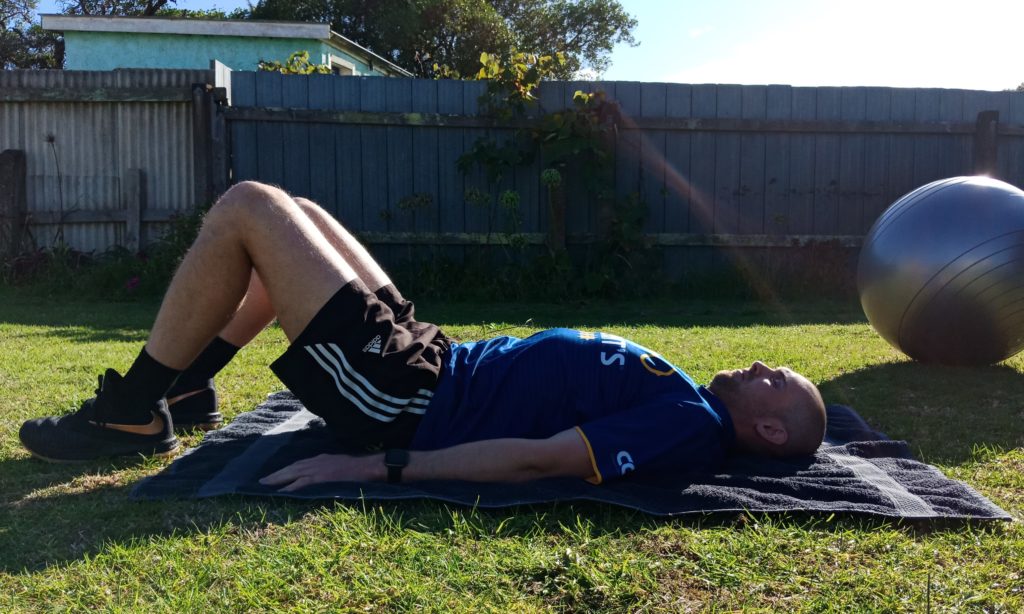
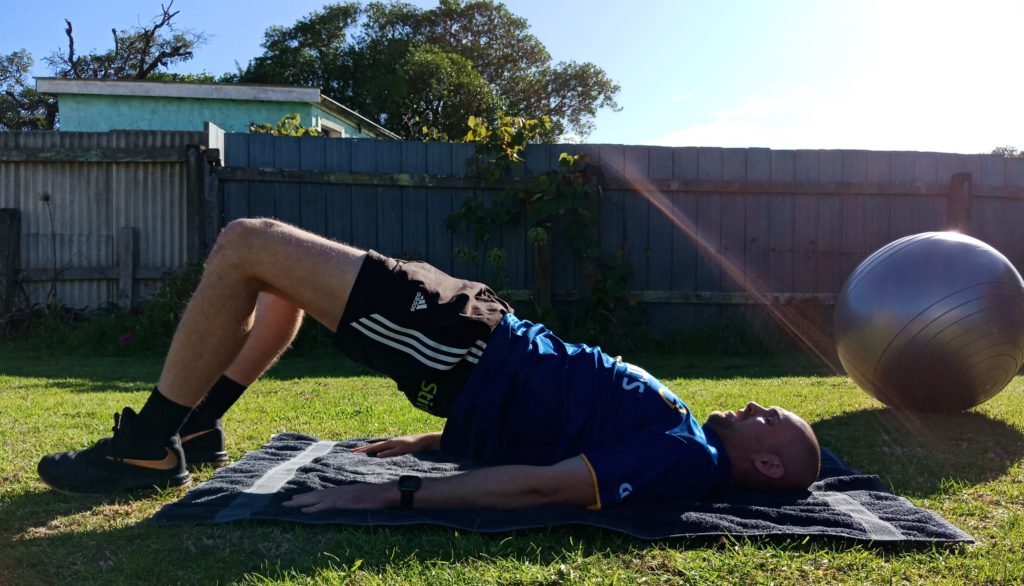
The other exercise I like to go with is the double leg bridge. The key being that you lift up as high as you can without the sharp or biting pain. Hold for 5-10 seconds and repeat 10 repetitions twice daily.

You can also get yourself on a stationary bike, adjusting the seat height to make sure that the revolutions don’t feel sharp or biting through the injured hamstring. Aim for 10-15 minutes daily.

Steady load phase (Week 1-6)

At this stage, I would expect the hamstring to be tolerable to light stretching and capable of withstanding progressive loading. Cycling should be pain free, with focus shifting to strengthening through full range before engaging in plyometric or running activity. As we load the hamstring up more, the goal is to complete exercises 3-4 times each week rather than daily as the hamstring will need recovery time to cope with the new demands placed on it. My go-to exercises are as follows:

Outer range isometric loading – a simple progression of the exercise in the acute phase, the difference being positioning the injured hamstring in an area of more length to make the muscle contraction more difficult. Same reps, aiming for 5-10 second holds 10 times.
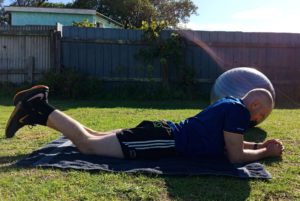
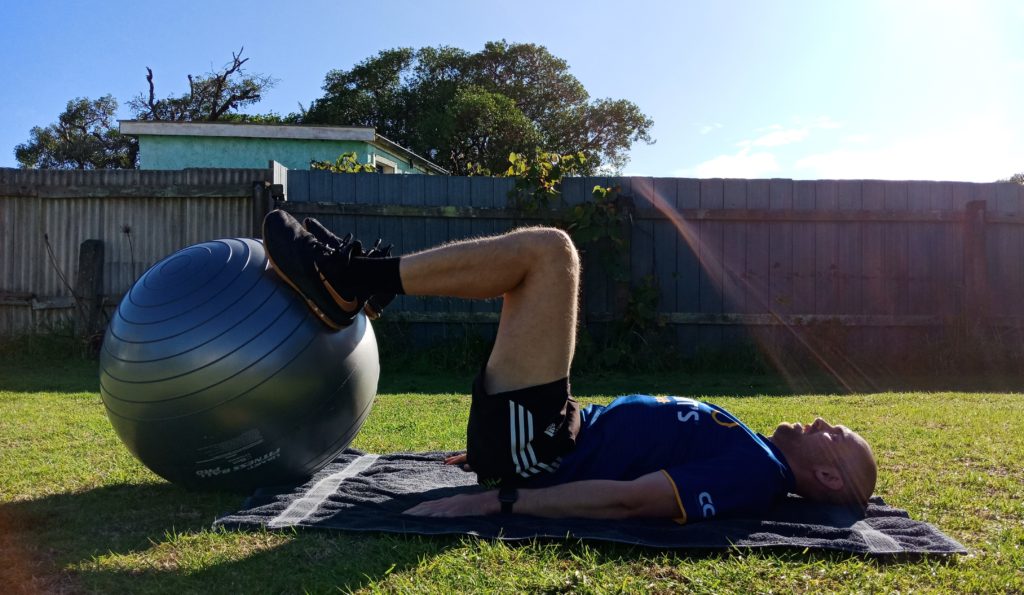
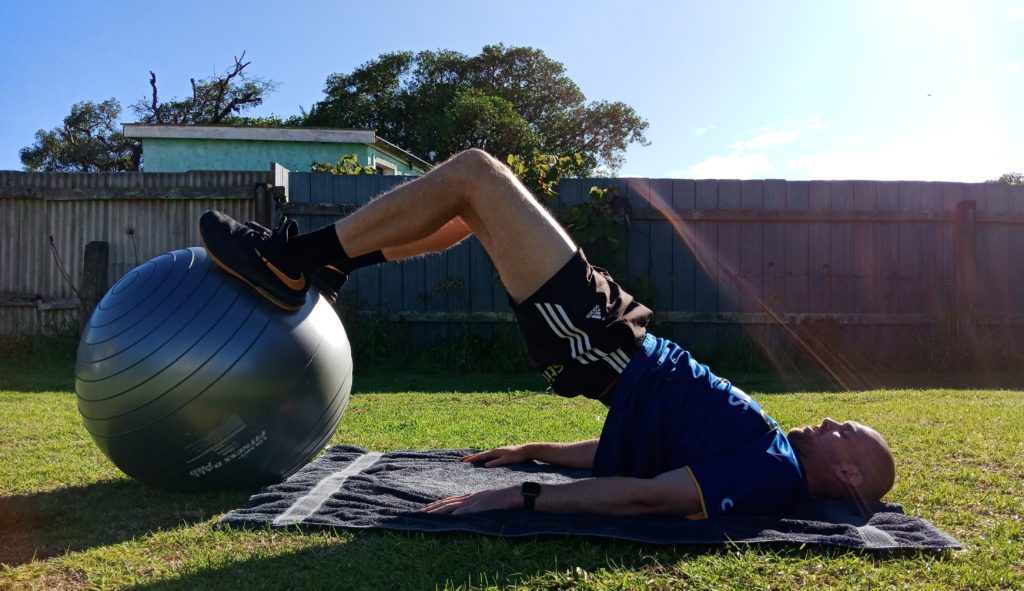
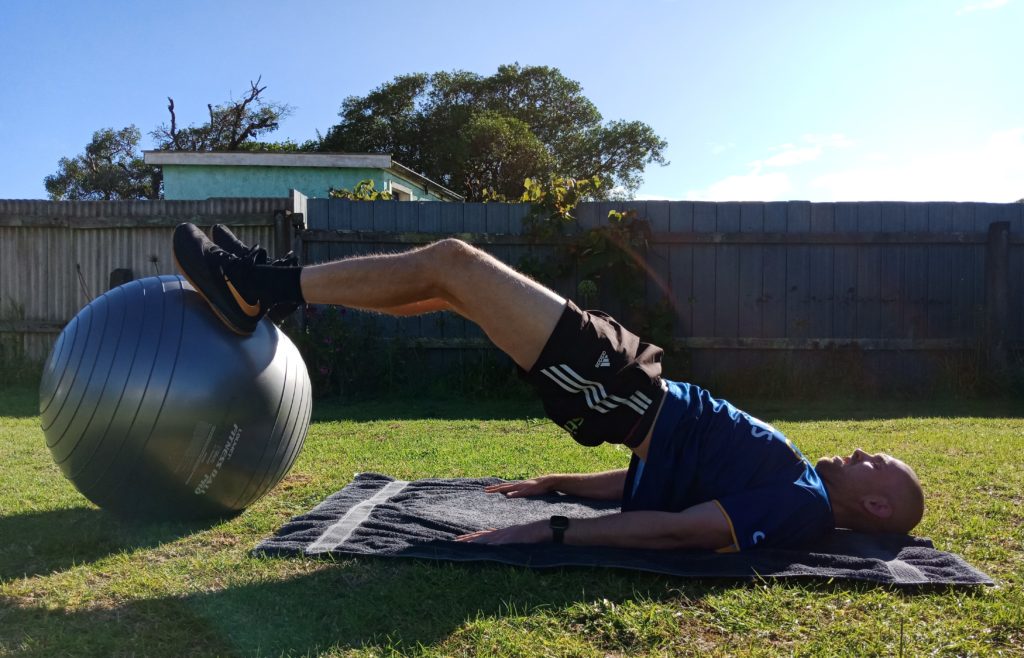
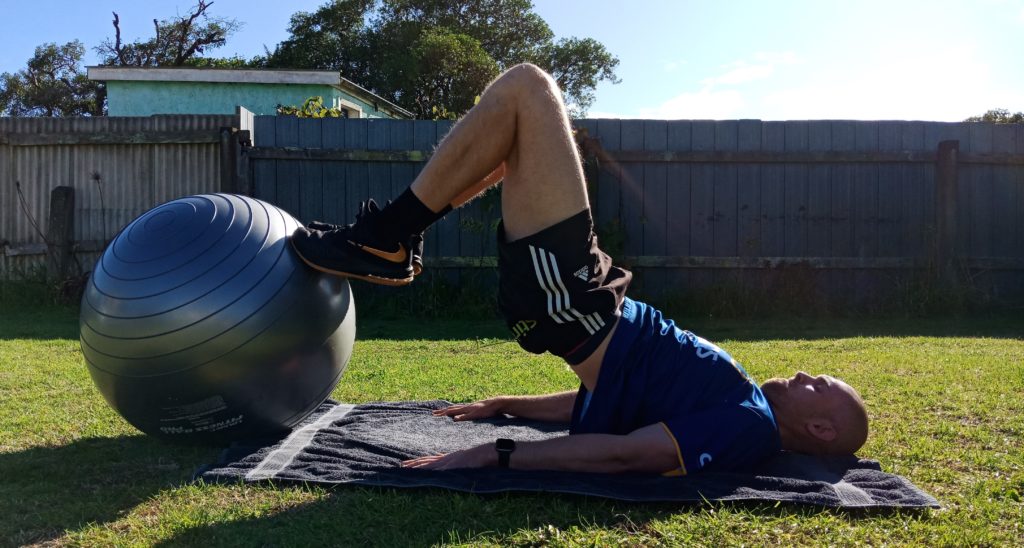
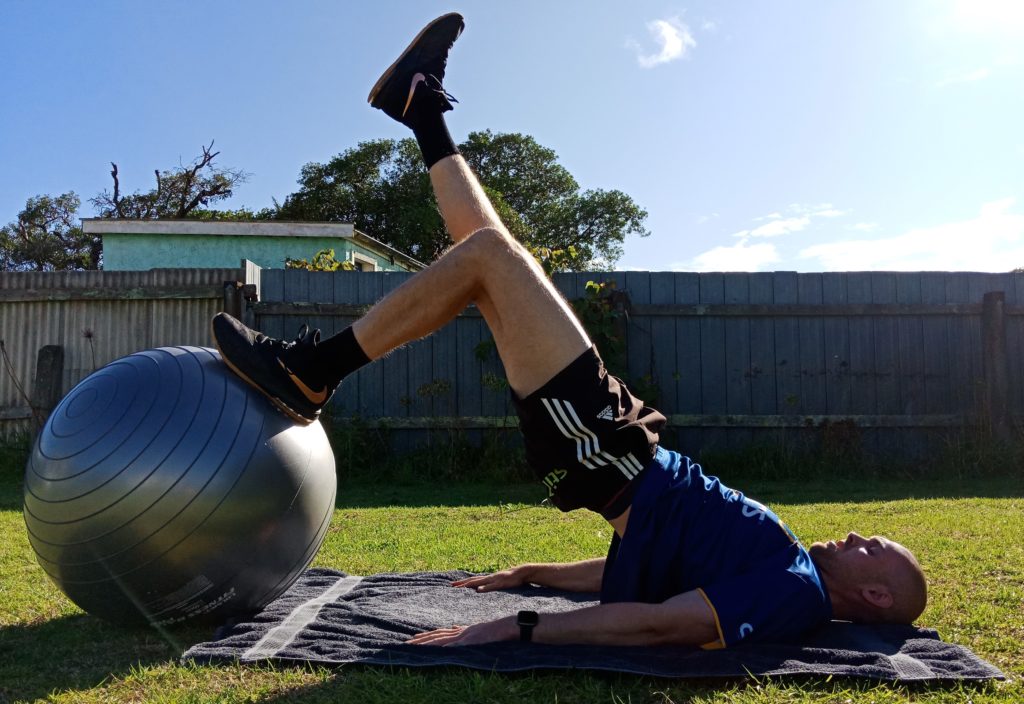
Bridging on swiss ball (double leg to single leg) – again, building on the other exercise from phase one. Bringing in the swiss ball encourages the hamstring and glute to work harder for stability as well as completing the exercise. Start with double leg holds, progressing to double leg holds with rollouts, before moving to single leg. You can also add a hamstring curl to this exercise if you’re feeling pretty good

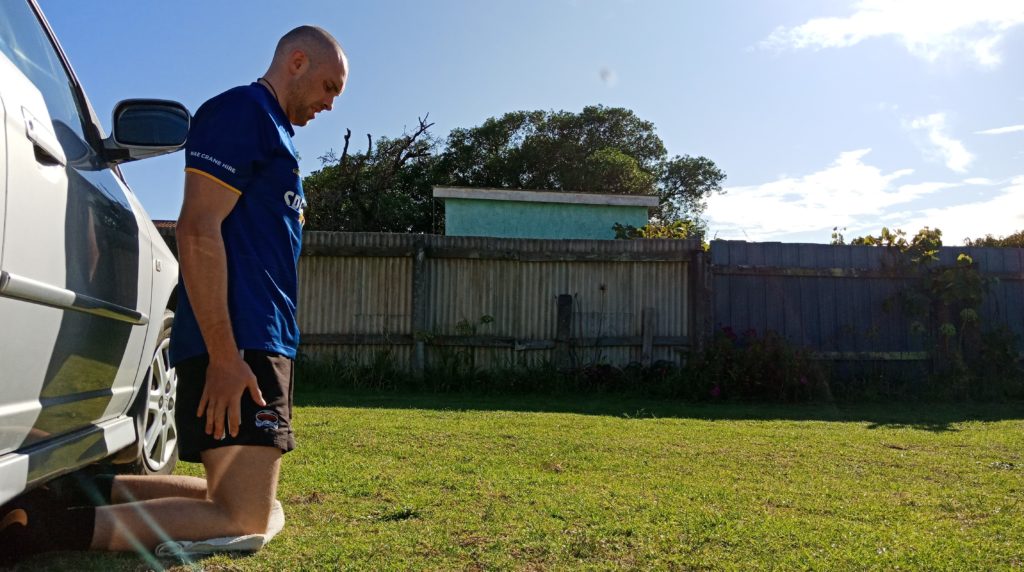
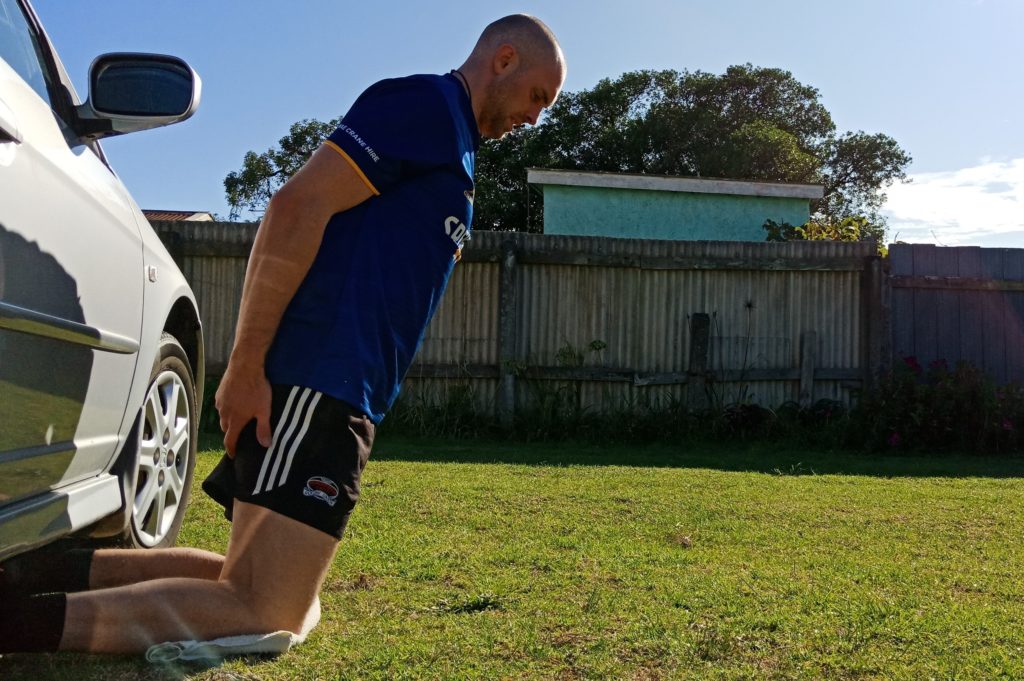
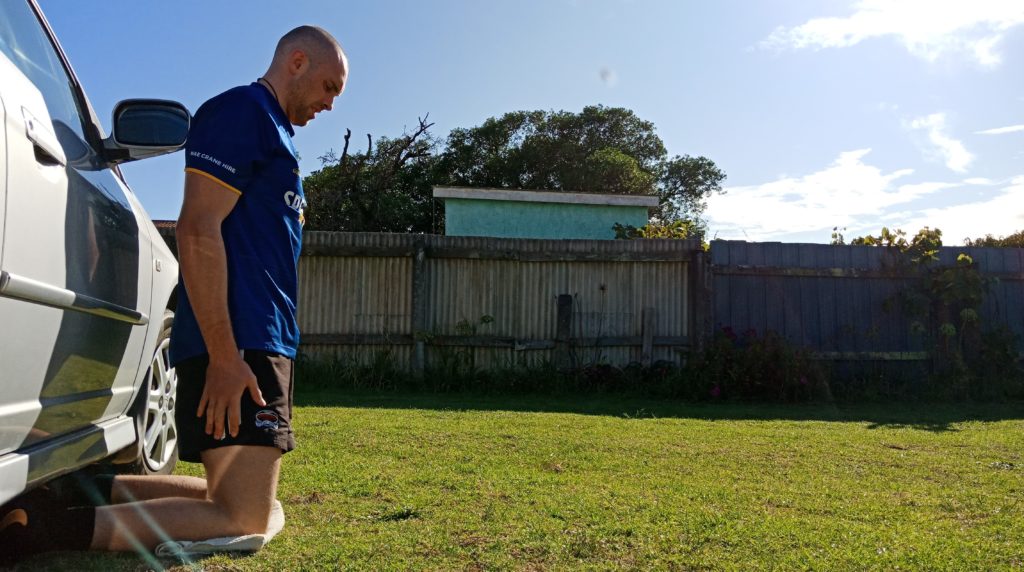
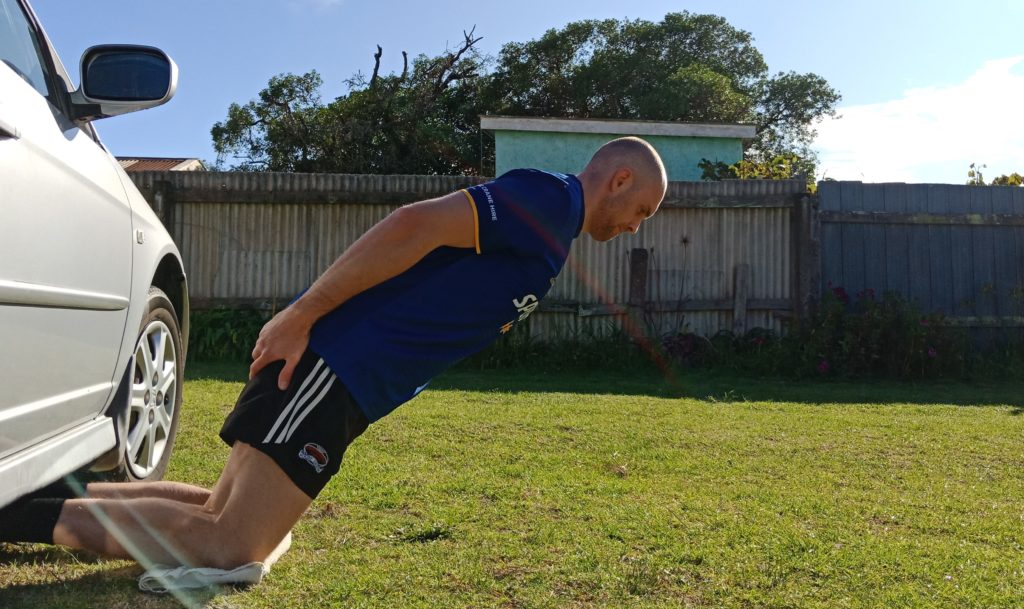
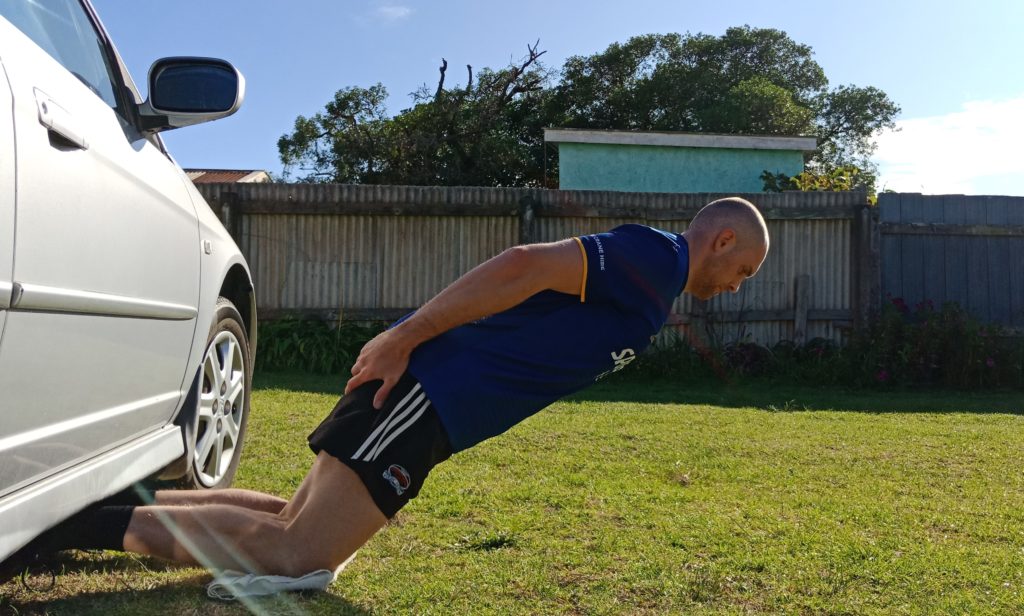
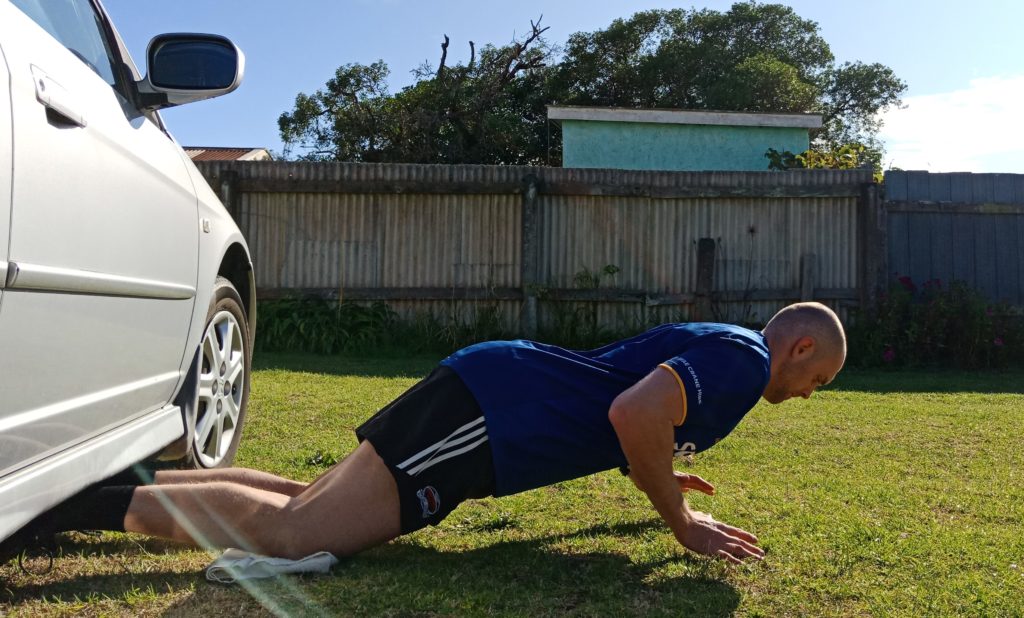
Nordic pulses – the beginning of a nordic drop. The idea here is to get the hamstring used to eccentric contractions, a vital component for returning to running (and more specifically sprinting). These exercises are best done with quality rather than quantity, so 4-5 repetitions of 5-10 second holds might be all your hamstring manages before it fatigues. I would recommend only doing “nordic” exercises 2-3 times a week initially as they can cause discomfort initially as you build them into your normal routine.

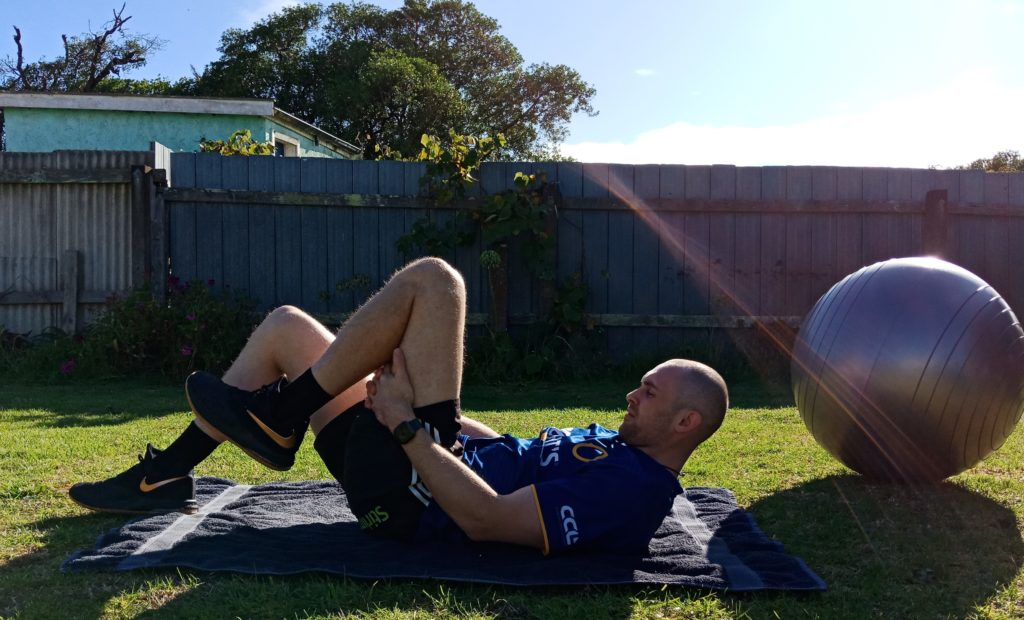
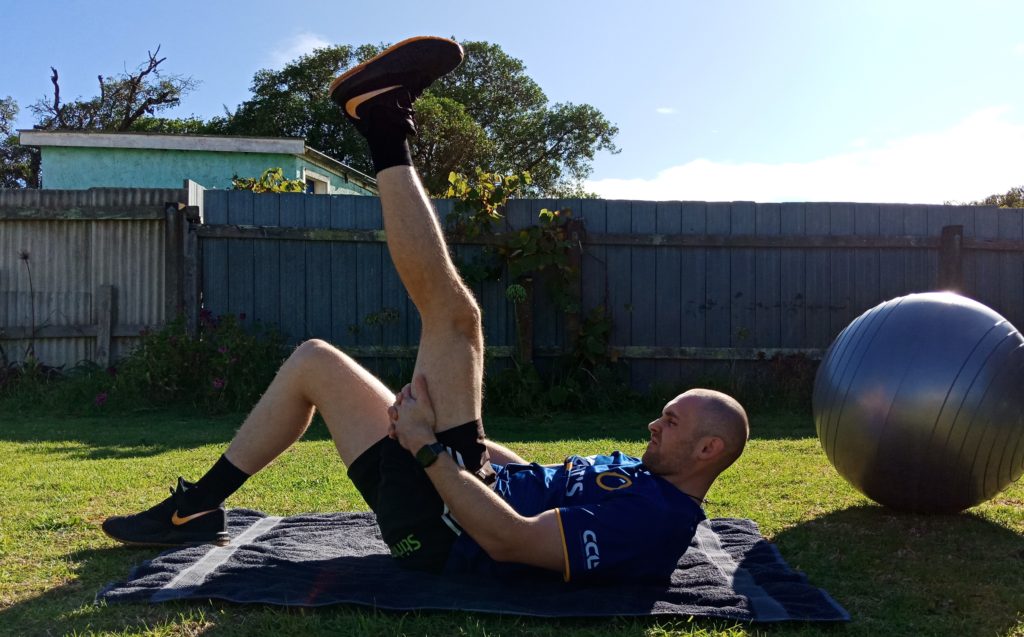
Hamstring flossing – start to get some sliding action along the hamstring by lying on your back with the affected leg up in the air. Gently straighten your leg out as much as you can manage without any severe pulling/biting/sharp sensations. Steadily work through the reps and you should feel the hamstring start to loosen up.

Hamstrings of doom phase (Week 4-6 and beyond)

Progression to this phase will depend completely on the degree of hamstring injury. Typically though, this is where walking, light jogging and all previous exercises have become painfree and equal (to 90+% of the other side) and there is no pain on palpation through the hamstring muscle. It’s time to WORK.

Full Nordics – you’ll need to lock in your feet, either with a heavy piece of furniture/equipment or utilizing a strong friend to hold your feet down. Keep yourself as upright as possible and slowly lower yourself down to the ground. Hold on for as long as you can, the longer the rep the more benefit you will get out of it. You probably want to aim for 6 good reps and 3 sets the first time you give it a go, steadily building up reps to the 10-12 mark. These are non-negotiable and should be done at least 3 times a week. It’s the only exercise that will make your hamstring muscle fibers longer and stronger at the same time. However, not all good things can last forever, and it can take as little as 3 weeks detraining to see a significant drop in fascicle length at the hamstring. I’ll post the study at the bottom for those interested.

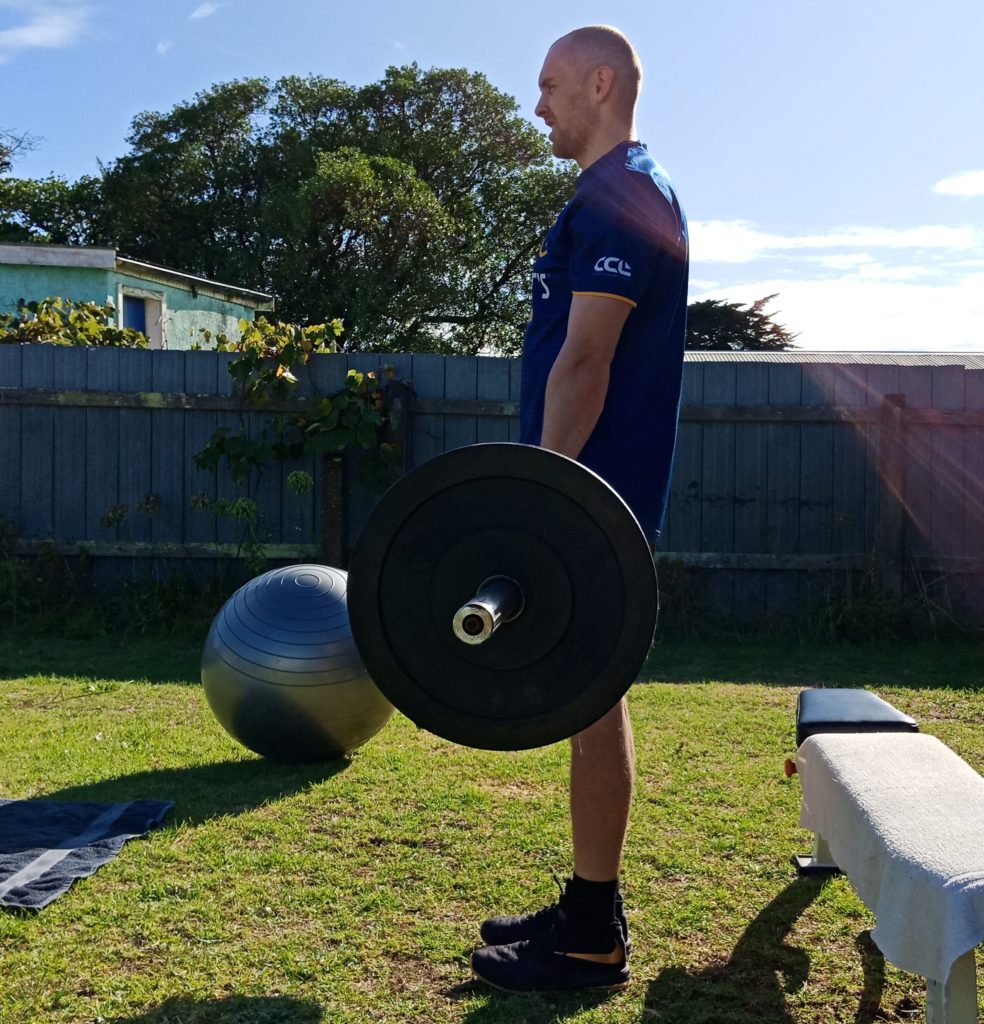
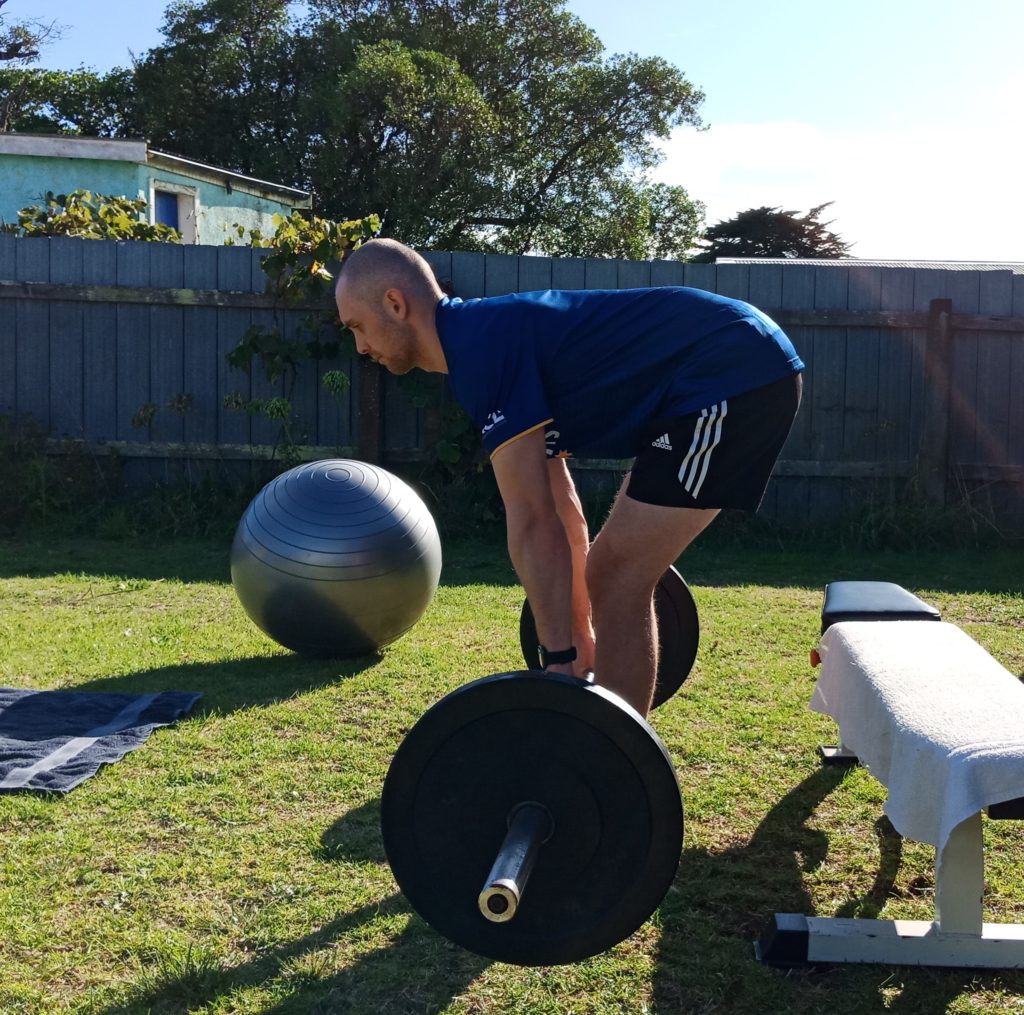
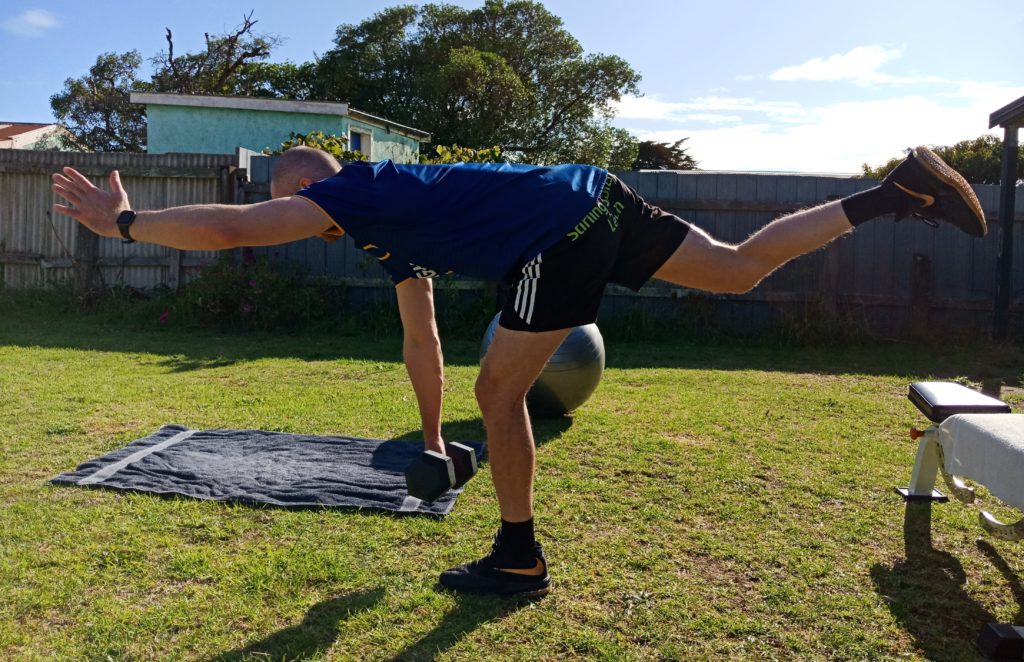
Romanian dead lifts – honestly one of the best exercises for glutes and hamstrings, in my opinion. You can also adapt them to a single leg exercise if you don’t have access to a huge amount of weight. The idea here is we keep the distal insertions of the hamstring at the same length, and increase the length at the proximal origin (the opposite of a nordic). You can use barbell, kettlebell, dumbbell, whatever bell you like. I’d emphasize a slow, eccentric down over a couple of counts before coming up at a regular pace. Keep knees straight, or with a very slight bend, and keep lower back/hips in slight anterior pelvic tilt (keep back flat rather than rounded). Complete slow, high reps on this one for endurance, or low heavy reps for maximal strength.

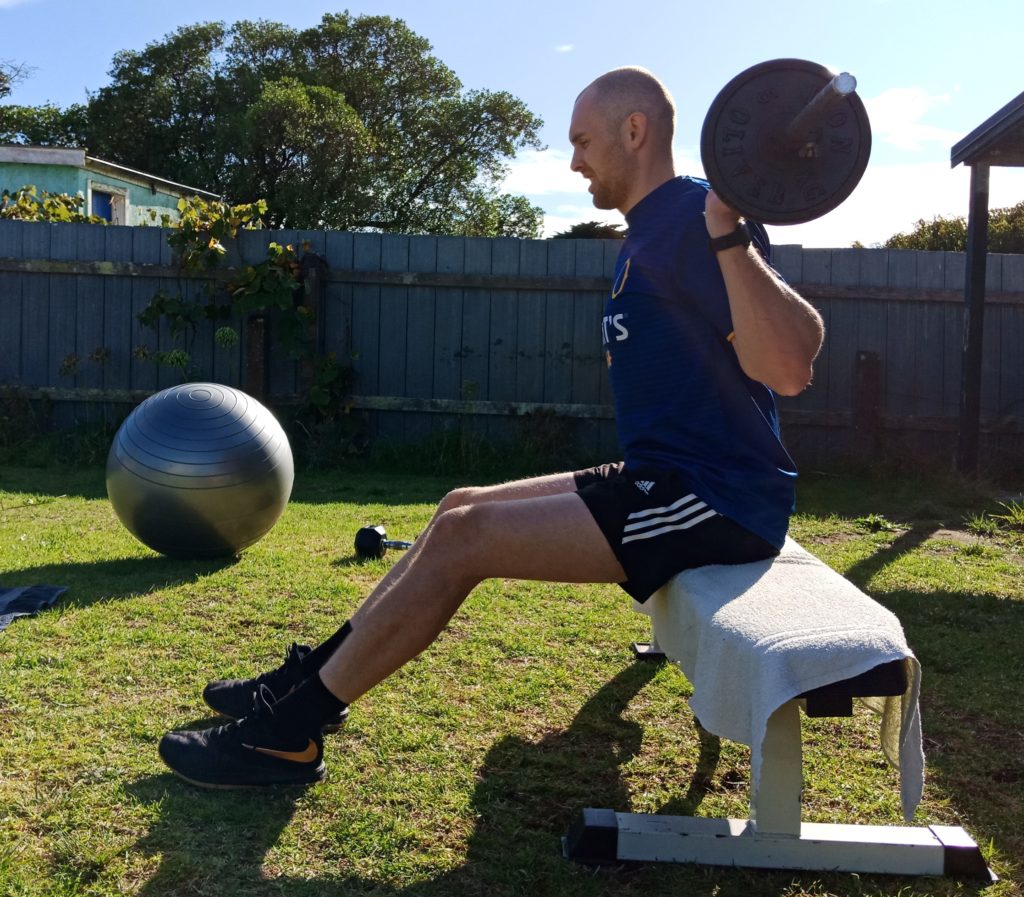
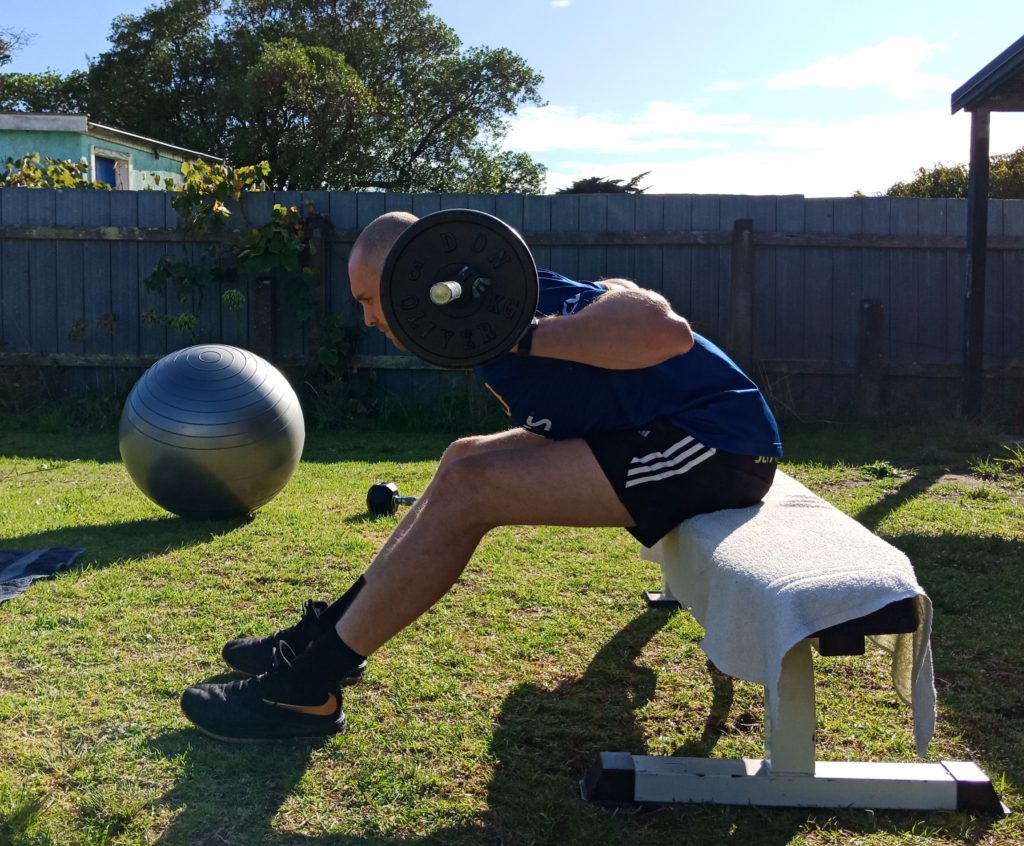
Seated good mornings – the last of my go-to exercises for hamstrings. A lot like the RDL’s we are changing hip position, but I feel as though shifting the point of load allows you get more of a loaded flossing stretch through the hammy. I’d only usually prescribe this in very slow, high rep ranges (15-20 reps)

Again, there are plenty of ways to rehab your hamstring. It may include rehabbing things that are not the hamstring to get to the root cause of your issue. There are also many more exercises I use on a daily basis with patients in the clinic, but, if you’re looking for a place to start, hopefully this gives you that. It is always best seek out a complete assessment and tailored rehab program for you. If that’s with me, well that’s even better.

Thanks for taking the time to read through my blog, if you have any comments or queries feel free to leave a comment below.

Cheers,

Teej

@theinjuredphysio

Extras for overachievers (unfortunately the first of these articles is not free, but the second one can be found through google scholar):

Alonso-Fernandez, D., Docampo-Blanco, P., & Martinez-Fernandez, J. (2017). Changes in muscle architecture of biceps femoris induced by eccentric strength training with nordic hamstring exercise. Scandinavian Journal Of Medicine & Science In Sports28(1), 88-94. doi: 10.1111/sms.12877

Tyler, T., Schmitt, B., Nicholas, S., & McHugh, M. (2017). Rehabilitation After Hamstring-Strain Injury Emphasizing Eccentric Strengthening at Long Muscle Lengths: Results of Long-Term Follow-Up. Journal Of Sport Rehabilitation26(2), 131-140. doi: 10.1123/jsr.2015-0099

What makes a sports physiotherapist special?

Last week my boss asked me to write a small piece about sports physiotherapy. I want to share it with you as the task has enabled me to reflect a lot on what I’ve learned and continue to learn doing what I do every day. It has been a big year in growth for me, as I continue to pursue my personal goals and develop towards the health provider I want to be in the future. So here it is!

With an ever growing choice of treatment providers here in New Zealand, sometimes it can be a difficult decision choosing where to go for help. Have no fear, as all the answers you are looking for, are right here.

For the average human to enjoy life, we must think of ourselves holistically. High schools and undergraduate university programs up and down the country teach this by incorporating the four pillars of health, our Hau Ora; the physical/taha tinana; the spiritual/taha wairua; the social/taha whanau; and the mental and emotional/taha hingenaro. With this in mind, it is therefore important that whoever you choose has a strong understanding for how all these pillars of health fit.

The sports physio has the upper hand as being involved in sports also requires an in-depth understanding of these four pillars.

The physical goes without saying, as physiotherapists are movement specialists by trade. But it’s not good enough to get people moving, a physio needs to get you moving well. The sports physio needs to have a deeper level of biomechanics, where getting a sports person back performing at the highest level they can becomes a habit of practice. It puts pressure on understanding the injury in its entirety, starting with an accurate diagnosis so the physio can tailor a rehab programme specific to what you need. This means that the sports physio won’t be satisfied with just getting you back to work or running 3 times a week. They will want you to do that effortlessly, so you can enjoy what you are doing.

The spiritual is, by nature, more difficult to see. But athletes have to embody all of who they are to perform at their best and the sports physio knows and respects this. This means that the sports physio will work with your beliefs and cultural needs intimately and incorporate these elements into your rehab programme. It helps to build trust in the physiotherapist, something vital in having the best outcome possible with the rehab plan. 

Sport is social. At one stage, most sports physios were sportspeople. The others usually still are. What this means is that they know how important it is to get patients back to regularity as being injured can have a big impact on your social life as well. It’s a common trend to find that a sports physio decided to take up the occupation following a positive experience with their own physio, who helped them return to sport, activity and being able to be around like-minded people.

That just leaves the mental well being. Let me start by saying up front that all activity we engage in has an element of risk that it could do more harm than good. As previously mentioned most sports physios were (or are) avid sportspersons. This means that the sports physio, more often than not, has been exactly where you are. Upset, frustrated, worried, and everything else that comes along with being injured. With this experience comes understanding, not just of what it feels like to be injured, but also what it feels like to lose a part of who you are. Sports is so much more than playing a game once a week. Its socializing with like-minded people, it’s the rush of achieving something challenging, it’s the community that you are a part of when you are tied to a club. Having someone guide you who has been exactly where you are adds an air of reassurance. They’ve been through it, they know there are good days and bad, times of optimism and others of feeling totally defeated. It is all of these elements that make the relationship between a patient and a sports physiotherapist so special.

So, should you ever find yourself injured or unable to complete the things you want to in life, seek out a good sports physio. And tell ‘em I sent ya. 

Teej

The Crux of Crutches: the 1-2-3 step guide

Crutches… Crutches… Crutches

During my time as a sports enthusiast, I have unfortunately become well acquainted with crutches. They are essential for enabling mobility while keeping weight off injured tissue, allowing natural time to heal as well as possible without overloading it.

But at the time, they can suck.

Crutches are awkward, they make your palms sore, they fall over when you try to lean them against the bench top, they are with us for what feels like an eternity (yes six weeks can feel that long) – and it’s a shame that the safe use of crutches is often left to the user to work out themselves.

Whether young or old, the skill of using crutches efficiently can be learned using these simple concepts. But first, lets make sure they are set up properly.

Small disclaimer: As the axillary (under armpit) crutches are pretty much extinct here in New Zealand, I’ll be focusing on the elbow crutch in this post.

#1 – Setting up the crutches

Crutches must be set up for YOUR body, and typically they are set up too high. It puts unnecessary stress on your arms and shoulders, and when saddled with crutches for 6 weeks or more, this will take it’s toll on your body.

To set up the crutches, stand up straight with your arms relaxed by your sides. If your balance is not good, then do this close to a bench top so you can support yourself, or get a friend to help. Allow your arms to hang so there is a subtle but comfortable bend at the elbows. The handle of the crutch should be set to your palms at this height. Set the forearm cusps to wrap around the upper third of the forearm (closer to the elbow), NEVER above the elbow.

As a quick check, stand in front of a mirror with your crutches. Gently apply force downwards into the handles to take your weight – maintaining that slight bend at the elbows. If you feel/see your shoulders visibly rise, then it is likely the crutches are too high. If you need to lean forwards to apply the pressure through the crutches, then it is likely the crutches are too low.

#2 – Walking for your injury

The pattern of walking could depend a number of factors including type of injury, stage of injury and/or medical teams advice. I will split these into non-weight bearing, partial weight bearing and near-full weight bearing (NFWB).

Non-weight bearing (NWB):

This is usually in the early stage of recovery, following some surgeries or if you have been put into a non-weight bearing cast.

This is the hardest stage of using crutches both physically and mentally. Every effort to stand up, get out of bed, go to the toilet will test you. Factor in the pain you’re likely experiencing and some days might not feel worth it.

But,

There is a reason for this, and it is to give your body the best chance it has at healing. So turn those mini-challenges into mini-victories! Apply the following patterns to make things as easy as possible.

The concept is simple. And its based on simple geometry.

You are going to use a triangle as your guide. The two crutches in tandem will make up two points, and your good (uninjured) leg will be the third.

Place the two crutches one regular step ahead of yourself, and step through one step ahead of the crutches with the other foot, and repeat. Take your time, be methodical initially until it becomes natural

Easy – but be wary.

It’s possible to get caught out by putting the crutches too far ahead of yourself. This will mean that rather than stepping through with your good foot, you end up swinging your body through. Although quicker, more momentum simply increases the chance of you or the crutches slipping, or having to hop to regain control. Be smart and stay safe.

Partial weight bearing (PWB):

Perhaps the injury is on the low end of the severity spectrum, or you’ve gone an extended period of NWB and the doctor/physio/specialist has given you the green light to start loading gradually.

Awesome job! Celebrate this mini-victory!

The pattern here doesn’t change. Put your crutches out first as before, next step with your injured foot to the middle of the crutches and “weight-bear” within pain-free limits, step through with your good foot and repeat.

Near full weight bearing (NFWB):

You are nearly there! Graduation and the point of throwing those blasted crutches out the door is almost upon you. Once again, well done on getting this far!

The likely change here is that you will be wanting to only use one crutch. As easy as that sounds, it is super common for people to make this harder than it needs to be.

Make sure the crutch is on the OPPOSITE side to your injured leg. This is crucial. Having it the same side will cause a walking pattern similar to a pirate with a wooden peg leg. It results in overuse of the upper body on that side an “hitching” of the hip on the affected side. It also abolishes the triangle rule that has served you so well to this point. Why change something that isn’t broken?

Instead have the crutch on the opposite side to promote even weight distribution and a far more regular walking pattern. The crutch and the affected leg come forwards at the same time, followed by a step through with the good foot. If you don’t believe me, try both ways! One will feel far more comfortable than the other

#3 – Conquering steps

Steps and stairs are another challenge for someone fresh to using crutches. It can be scary, and fear of falling can be debilitating enough to keep people at home or even worse confined to the ground floor of their homes.

Steps are managed by remembering this: GAS goes UP, and SAG comes down.

G.A.S means Good, Affected and Sticks, and applies to scaling UP stairs.

  • First, place your GOOD leg up one step,
  • Next, bring your AFFECTED (injured) leg up to the same step,
  • Last, bring your STICKS (crutches) to the same step as well, and repeat.

S.A.G is the opposite, for when going DOWN stairs.

  • First, place your STICKS on the step below,
  • Next, bring your AFFECTED leg to the same step below,
  • Last, bring your GOOD leg to the same step below, and repeat.

It’s now up to you to put this into practice!

If you’ve made it this far, thank you for reading my blog. All the information covered is intended to help you through your injury, as it has helped me through mine.

If you did find this helpful, don’t hesitate to mention it to a friend who might benefit from it as well.

Take care out there, and lets continue to rehab and train together!

Teej

A LisFranc Fracture: The next rare injury to add to the collection

I am convinced I must have done some terrible things in a previous life.

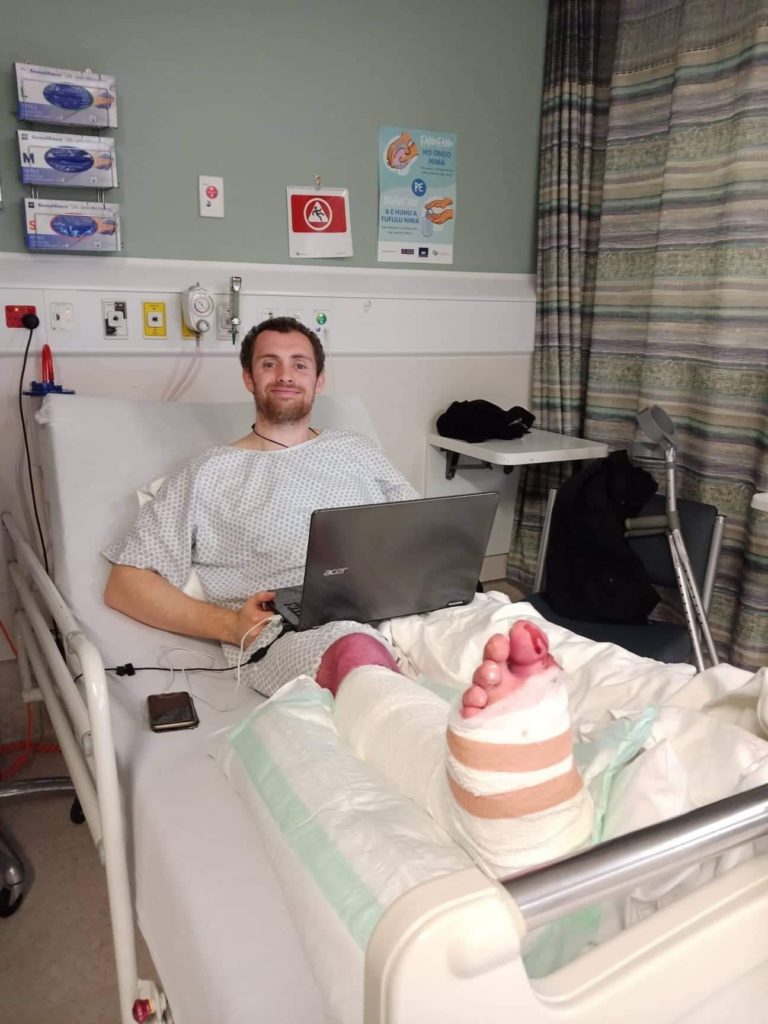
I’m writing this from my hospital bed following surgery for a Lisfranc foot injury I sustained 5 days ago playing a club rugby. For the record, a Lisfranc fracture is one of the most commonly missed injuries in primary care, and mine would have fallen into this category had I ignored my gut instinct and followed the advice of the urgent doctors.

But this post is not a gripe about the sometimes sub-par treatment delivered for musculoskeletal injuries in after-hours care, they have a really difficult job with patients that are often in immense levels of pain and discomfort. In this post I’m going to take you through how to not miss a lisfranc fracture, with a first-hand account of what it felt like to sustain it, and what my next steps are on the road to recovery.

Lisfranc Fracture

The Lisfranc joint involves the tarsometatarsal (TMT) joint complex. The injury is usually sustained with the foot in full weight bearing and plantarflexion, with a translational or torsional external force applied to the foot. This causes the small ligaments between these bones to tear and sometimes avulse, resulting in displacement and therefore unstable joints under weight bearing.

Previously, I have seen one case which presented to me after 4 weeks of being in a moonboot and foot pain that was not improving. The mechanism was simple, the patient had stepped down from a curb and stumbled forwards while crossing a road. She felt/heard a popping/crunching sensation at the time and her main complaint was that her foot felt like it was separating under her own weight, pretty much a 1, 2 and 3 of key things to look for should someone present to you with mid-foot pain.

One thing I’ve learned with Lisfranc injuries, is that appropriate radiographs need to be taken as soon as possible. To pick this injury up, it is almost empirical that weight bearing x-rays are obtained as well as non-weight bearing views. This is because the radiologist looks for widening of the Lisfranc joint, which will not be shown in non-weight bearing views.

So it seems pretty simple doesn’t it: A plantarflexed foot under translational/torsional load, popping and cracking sensation through the midfoot (NOT THE ANKLE) and a sensation of separation or the foot being unstable after the injury will make you suspicious of a Lisfranc fracture, with the logical next step being to obtain weight bearing comparison radiographs to rule in/out a Lisfranc fracture.

How I knew I’d broken my foot

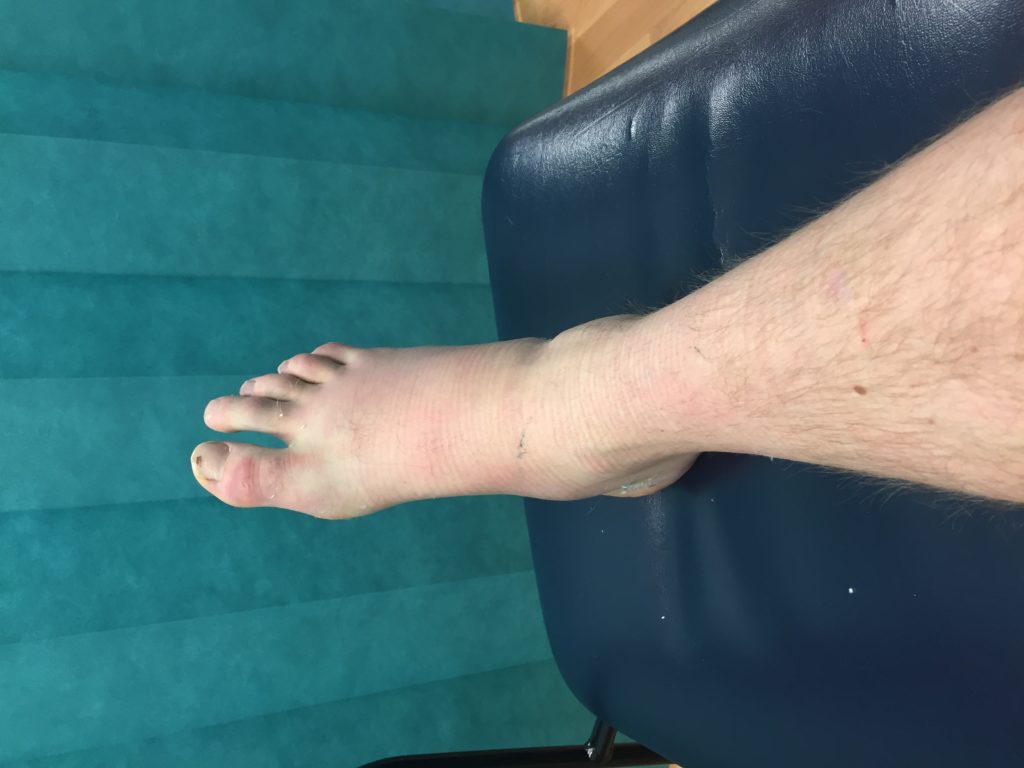
It all happened very quickly, but I feel like I had a good handle on the sequence of events. I was stepping a player pushing of my right foot, the tackler made contact so I looked to offload to my left. As I came down in the tackle, I felt the toes of my right foot stick into the ground, and the middle part of my foot roll inwards, with multiple clicks and crunches as I came down. It hurt immediately, and as I went to stand and run to the next phase of play, I felt my foot give way and the bones in the middle of the foot did not feel like they were sitting in the right place. It was a deeply sickening sensation. Even before getting my rugby boot off the swelling had already started, and within 15-20 minutes my foot had ballooned completely with swelling. Putting two and two together, it was obvious that I’d seriously damaged my foot.

I went to urgent doctors as that was the best care available where I was, and they took non-weight bearing x-rays. The initial impression was that there were no obvious misalignment or fractures of my foot, but the radiologist report recommended the weight bearing views be obtained as there was evidence of subluxation of the second metatarsal on the lateral view. Two days later after waiting 5 or so hours in accident and emergency I got the weight bearing views which confirmed a lisfranc fracture. A CT scan shortly followed and 3 days later here I am with two plates and a screw holding the middle part of my foot together. Overall, this is a really good outcome compared to my previous patient that had been walking around for four weeks with a broken foot that was not going to heal by itself.

What comes next?

I’m currently waiting on final x-rays, after which I’m hoping to be discharged to go home. I’ve been told that I will be 6 weeks in cast, and then a further 4 weeks in a moonboot before progression to full weight bearing. Thankfully, a progression of rehabilitation following a lisfranc surgery has already been published by Porter et al. 2019. I’ll leave the link at the bottom of the page but unfortunately the paper is not free to view. I’ll briefly explain the four phases of rehabilitation: (these have been taken from table 4 of the paper by Porter et al. 2019)

Phase 1: 1-6 weeks post-op

Clinical goals:

  • Full ROM ankle – dorsi, plantar, inversion and eversion
  • Full ROM MTP joints (toes)
  • Control swelling
  • Desensitize foot

Exercise

  • NWB for full 6 weeks
  • Toe curls – active and passive
  • Achilles tendon stretching with towel
  • Strengthening with theraband at 2 weeks all directions of the ankle
  • All upper extremity lifting
  • Body weight leg extension and curls, seated calf raises in non-weightbearing

Phase 2: 6-12 weeks post-op

Goals:

  • Strength comparable to opposite side
  • Bilateral double to single toe raise
  • Wean out-of-boot into carbon fiber plate and orthotic/athletic shoe
  • Proprioception retraining activity in shoe
  • Wean off crutches over 10-14 days

Exercise

  • Stationary bike in boot until 8-10 weeks post-op
  • Proprioception retraining in boot 6-10 weeks post-op and in shoe 8-12 weeks post-op
  • Bilateral standing toe raise work to single toe raise

Phase 3: 12-16 weeks post-op

Goals:

  • Full ROM, strength and flexibility
  • Restore normal proprioceptive retraining at rest/standing
  • Begin running, and sports-specific training

Exercise:

  • Advanced proprioceptive retraining
  • Increase from biking to stair-stepper/elliptical/AlterG to running
  • Can begin leg press when able to do stair-stepper/elliptical
  • Can do squats/clings/lunges after can run

Phase 4 – 3.5-9 months post-op
Goals:

  • Removal of hardware typically at 3.5-5 months post-op
  • Return to sport is 4-6 months for high school, 5-8 months for college and 6-10 months for professional athletes

Exercise:

  • Sports specific performance exercises and conditioning for full play

https://scholar.google.co.nz/scholar?hl=en&as_sdt=0%2C5&q=Injury+Pattern+in+Ligamentous+Lisfranc+Injuries+in+Competitive+Athletes&btnG=

If you have made it this far, thank you and stay tuned for updates on my progress via my instagram @theinjuredphysio. Let’s get back to rehabbing together!

References:

Mora, A., Lunz, D., & Kao, M. (2018). Return to sports and physical activities after open reduction and internal fixation for Lisfranc injuries in recreational athletes. Foot & Ankle Orthopaedics3(3), 2473011418S0036. doi: 10.1177/2473011418s00361

Porter, D., Barnes, A., Rund, A., & Walrod, M. (2018). Injury pattern in ligamentous Lisfranc injuries in competitive athletes. Foot & Ankle International40(2), 185-194. doi: 10.1177/1071100718802264

Singh, S., George, A., Kadakia, A., & Hsu, W. (2018). Performance-based outcomes following Lisfranc injury among professional american football and rugby athletes. Orthopedics41(4), e479-e482. doi: 10.3928/01477447-20180424-03

Giving the Boot to Groin Injuries

By playing sports that required me to kick, I guess I should have seen a hip/groin related injury coming from a mile away. However, the way I ended up injuring my groin was squatting in a gym.

I had broken my ankle around 1o-weeks prior to this injury. I was in a cast, initially, for 4 weeks, and a moonboot for the following 6. The day of the injury, I was simply ecstatic to be finally free from the clutches of immobilization. Finally, I was “bulletproof” again.

I was in a squat rack, with the weight the same as it was pre-broken ankle. I remember my knees dipping in, and feeling a slight popping sensation through the front of my pelvis. It didn’t really hurt that much at the time, so I didn’t think I’d done anything serious.

I only realized things weren’t quite normal a few days later, when I was out playing social touch rugby with a few mates. I didn’t really have much pain, but I just couldn’t sprint. It was so strange. I could turn, jog, jump, lunge and dive. As the weeks rolled by, I started to notice that sitting was becoming sore the longer I sat for, and driving was near impossible for more than half an hour. I also had pain on coughing and sneezing, so I started to become quite concerned.

My physio also wasn’t sure what was going on, but had a thought that it could have been coming from my groin, as a GP had ruled out a hernia or anything like that as a diagnosis. The next step was to send me on to a Sports GP due to the length of time that had passed (about 3-4 months since injury at this point), and the with the rugby season approaching
rapidly.

The Sports GP diagnosed an Adductor Longus Tendinopathy. The Adductor Longus is one of the inner thigh muscles that make up the groin, with an origin through the front of the pubis (where the majority of my pain was felt). The most obvious test he used to prove the pain was muscular, was when he got me to lie in a sit-up position, and asked me to squeeze his fist between my knees. The pain was automatically reproduced, and I for the life of me could not generate any power between my knees.

What we did about it:

He started me on what is more commonly known as the Holmich Protocol. Per Holmich is a danish professor and researcher who has contributed a huge body of work to the understanding, treatment and prevention of groin injuries. He mostly works with football players, due to the increased incidence of groin injury in that population. It’s based around a series of exercises that are broken up into two modules, below are 3 of my favourite exercises from each module, but I will attach the full protocol in a link below. The exercises below are slightly modified so that you don’t need a lot of equipment to be able to complete them

Module 1

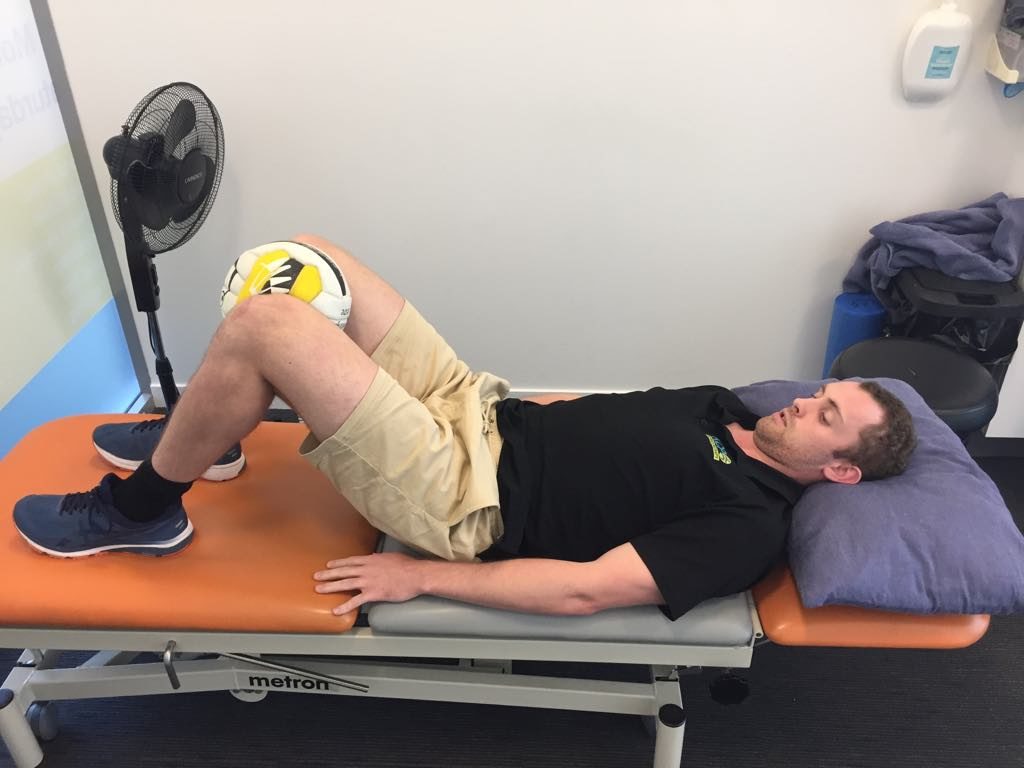
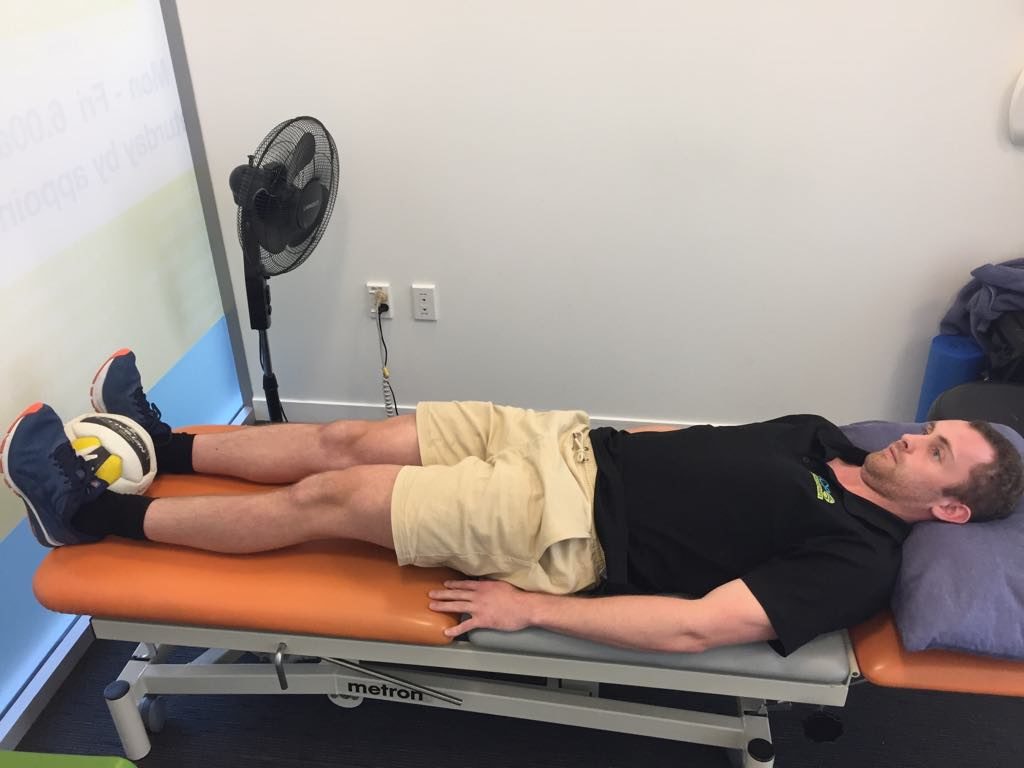
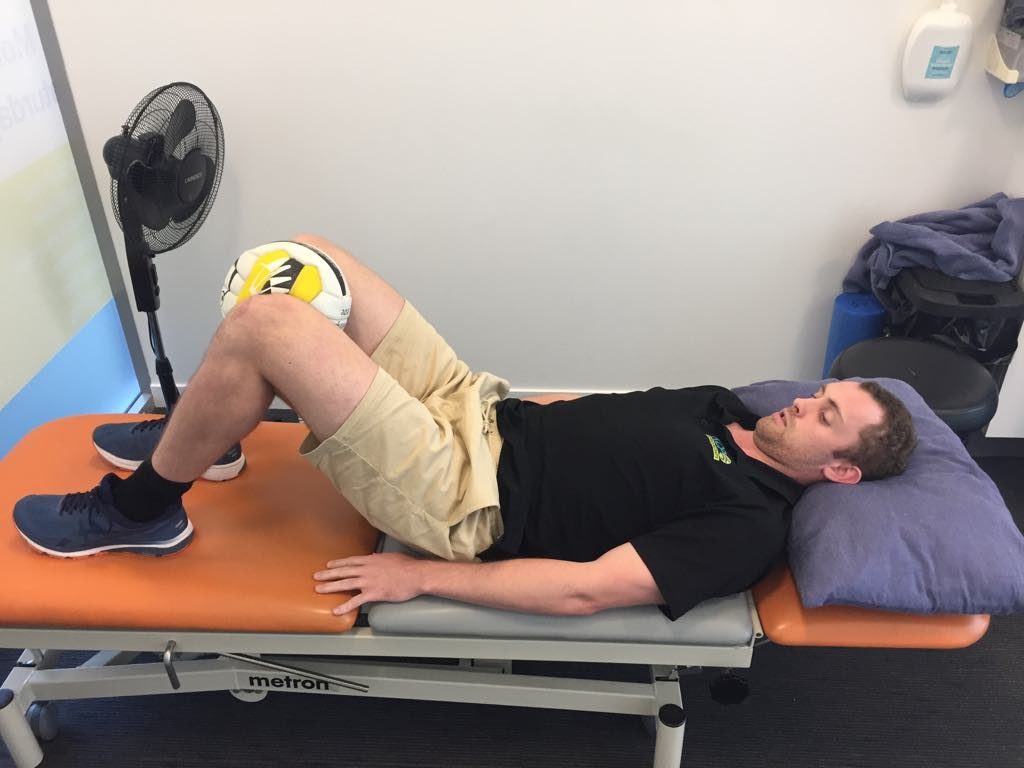
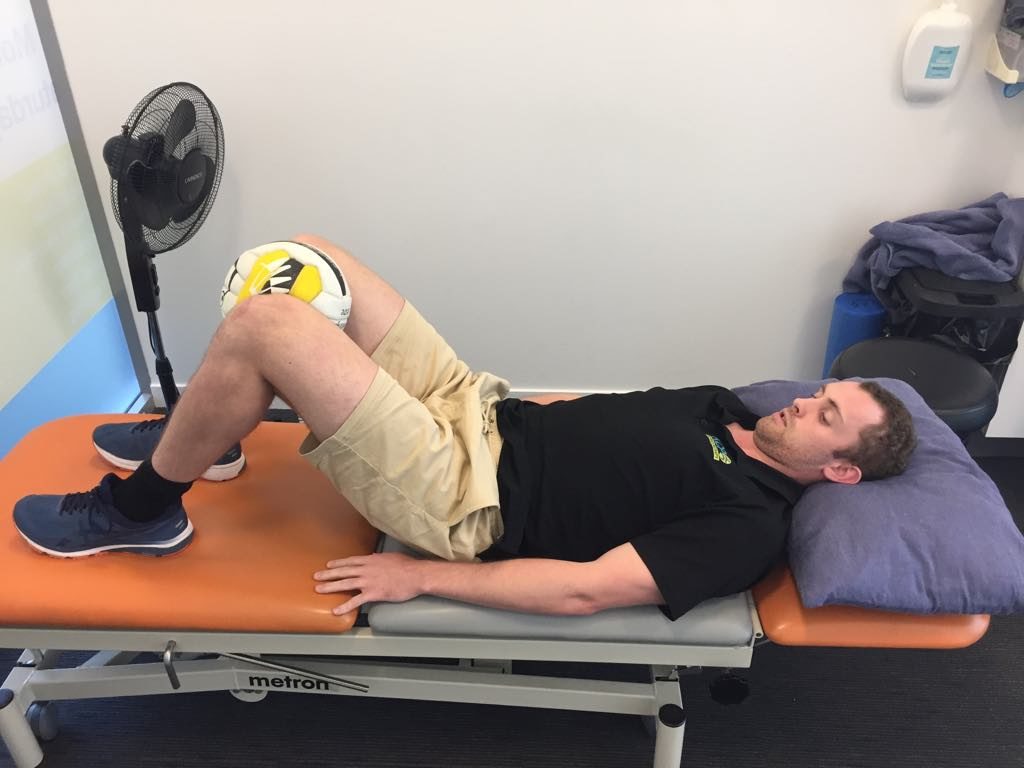
  • Place a ball between your knees and squeeze as hard as you can for 10 seconds. Move the ball to between your feet and then squeeze for a further 10 seconds. Have 10 seconds rest and repeat 10 times.
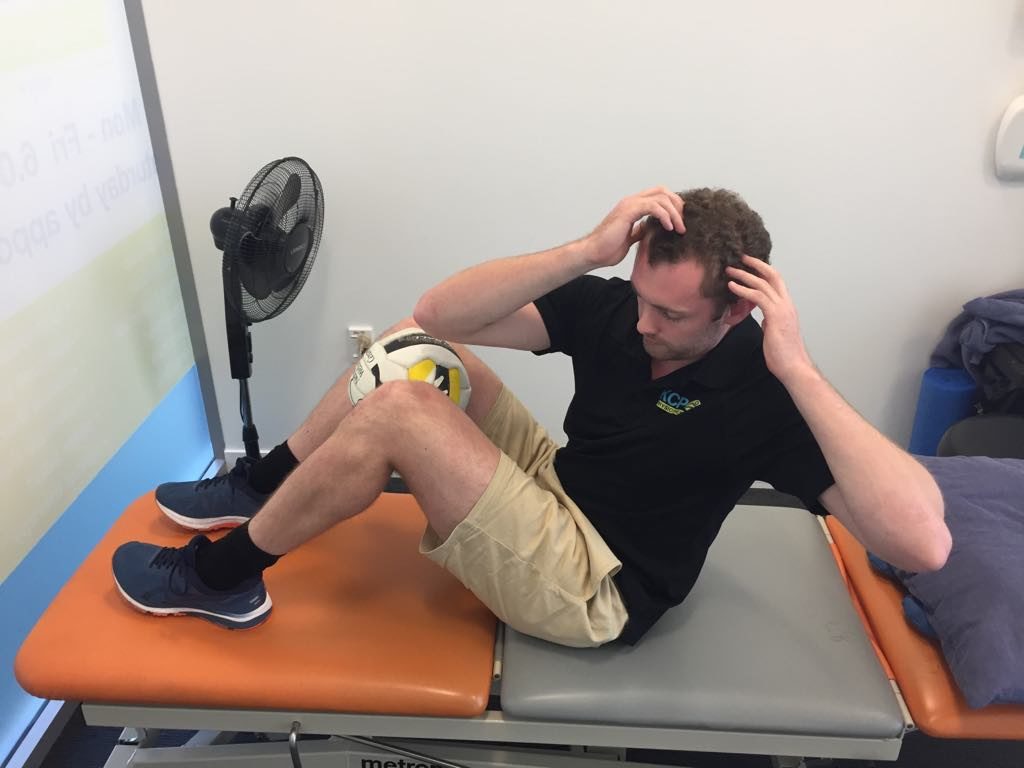
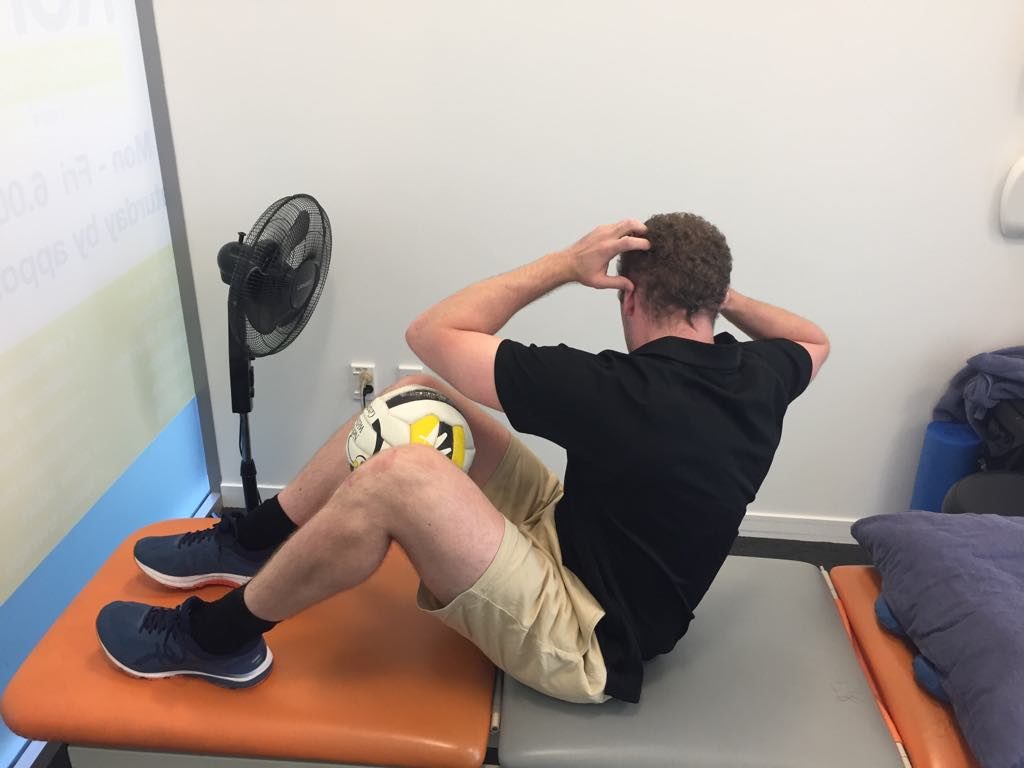
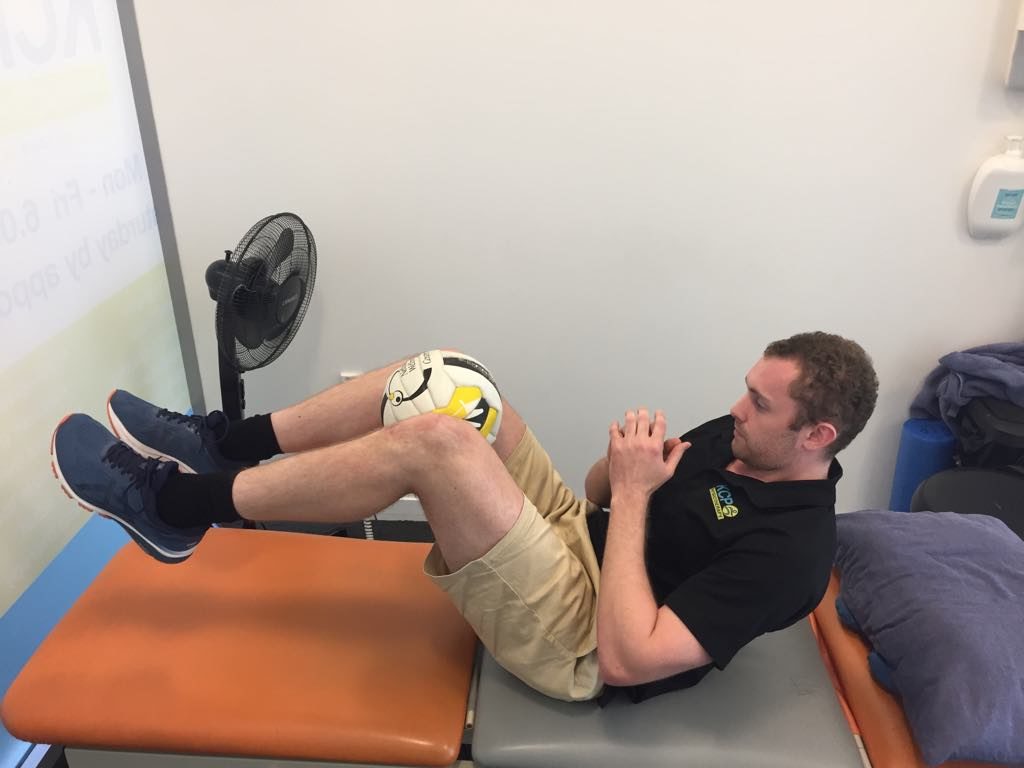
  • Place a ball between your knees in a sit-up position. Perform a sit-up bringing your right elbow to your left knee, then a regular sit-up and then bringing your left elbow to your right knee. Repeat this 10 times, for a total of 5 rounds, with 1 minute rest between each round.
  • Place a ball between your knees pre-situp position. Bring your knees up and perform a sit-up at the same time, making a “jack-knife” shape. repeat this for 5 sets of 10 reps, with 1 minute rest between each set.

Module 2

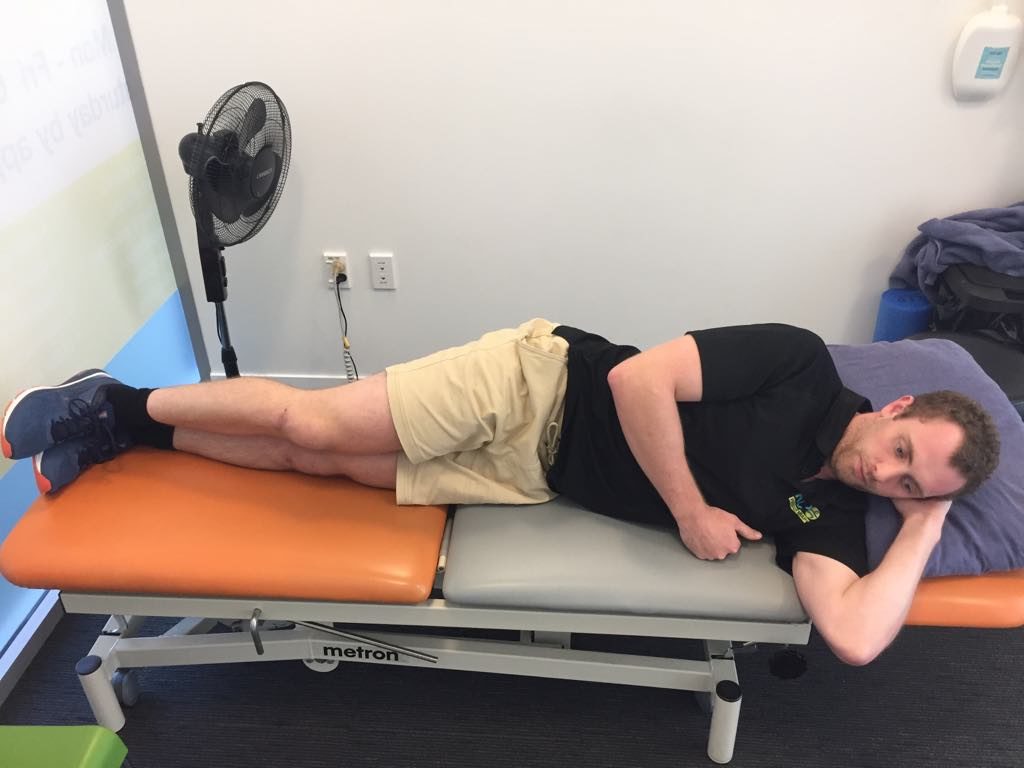
  • Lie on you side and lift your top leg up as high as you can. Repeat this 10 times for a total of 5 sets. (This one is also a good primer exercise before sport/activity.)
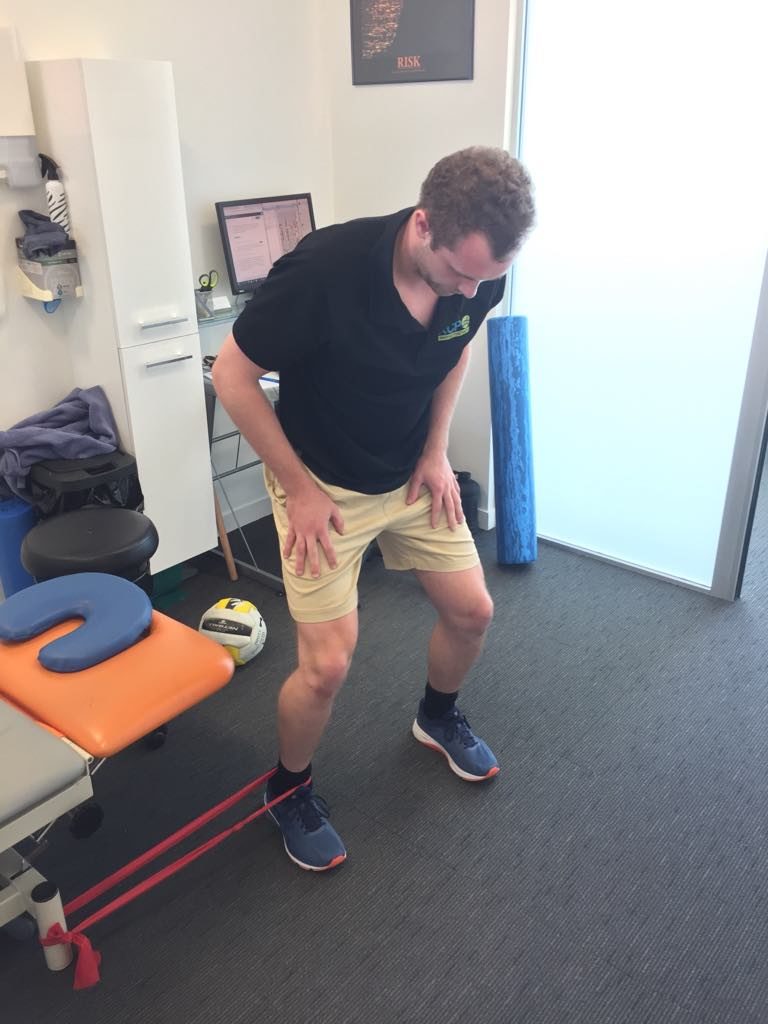
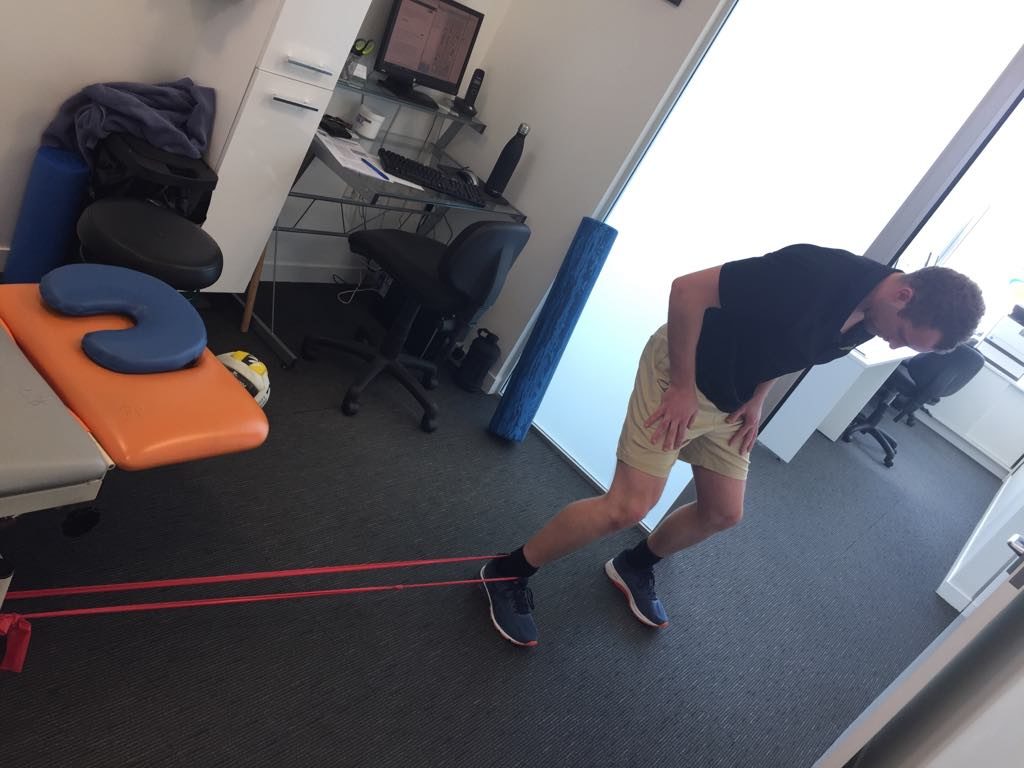
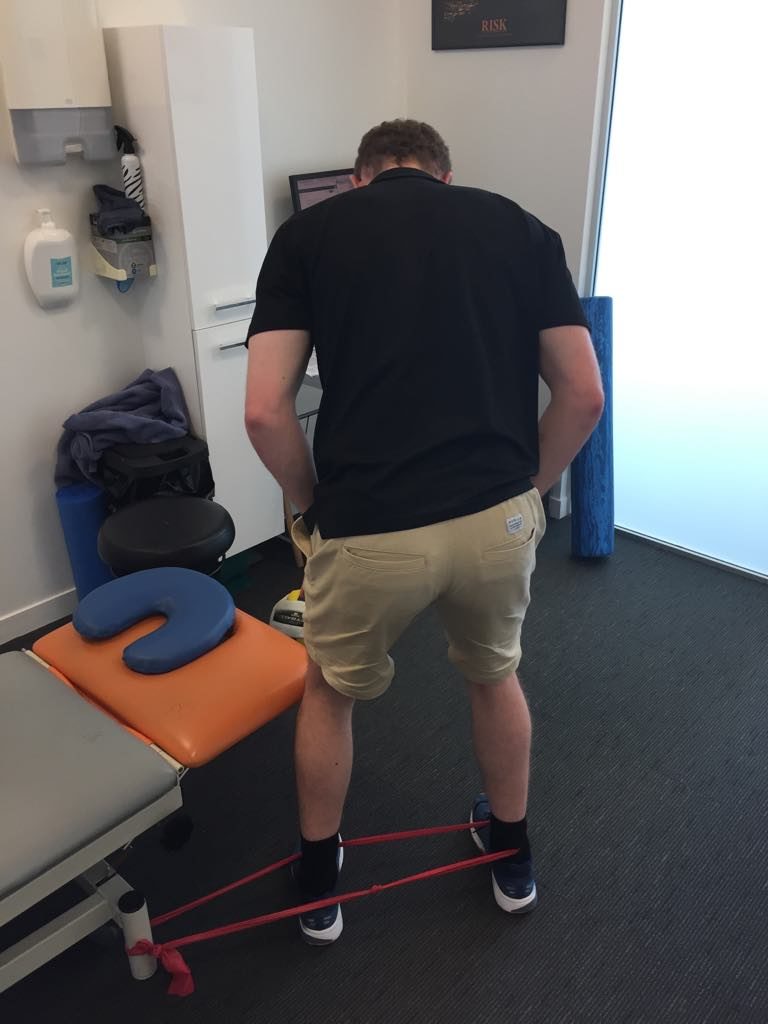
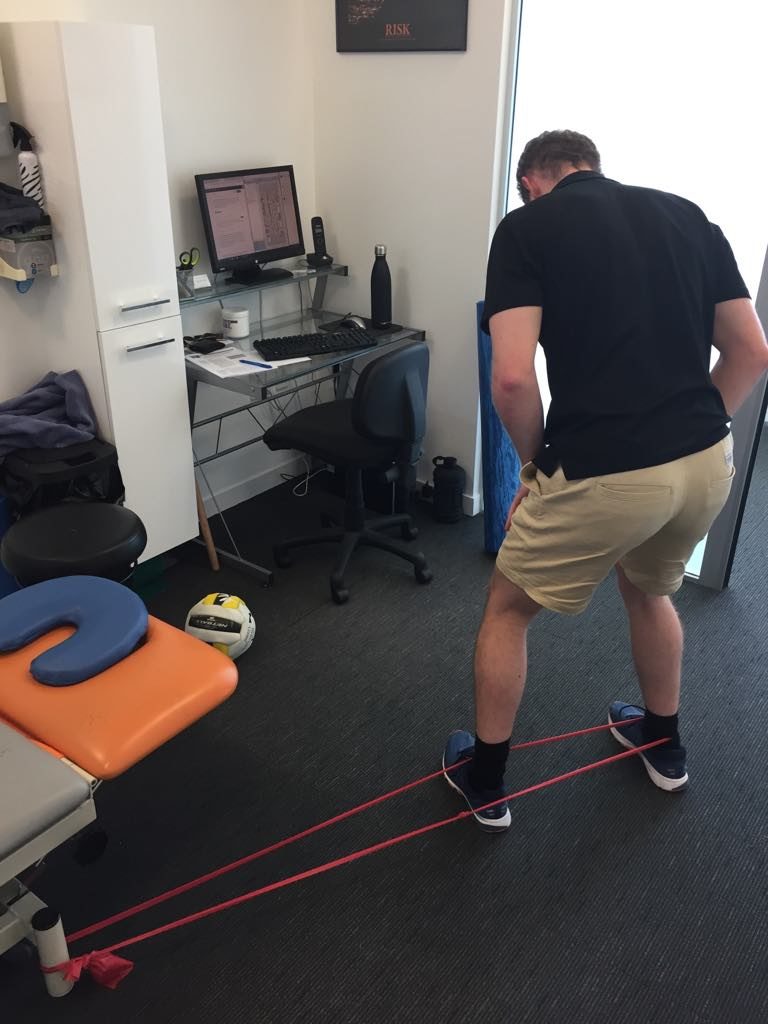
  • Using a Theraband tied under a stable table/chair and around one of your ankles, take 5 steps to the side increasing the tension through the band. Take 5 steps back towards the table, controlling the leg with smooth movement. Turn 180′ and repeat the 5 steps out and back. Rest for 1 minute between sets and complete 5 sets in total.
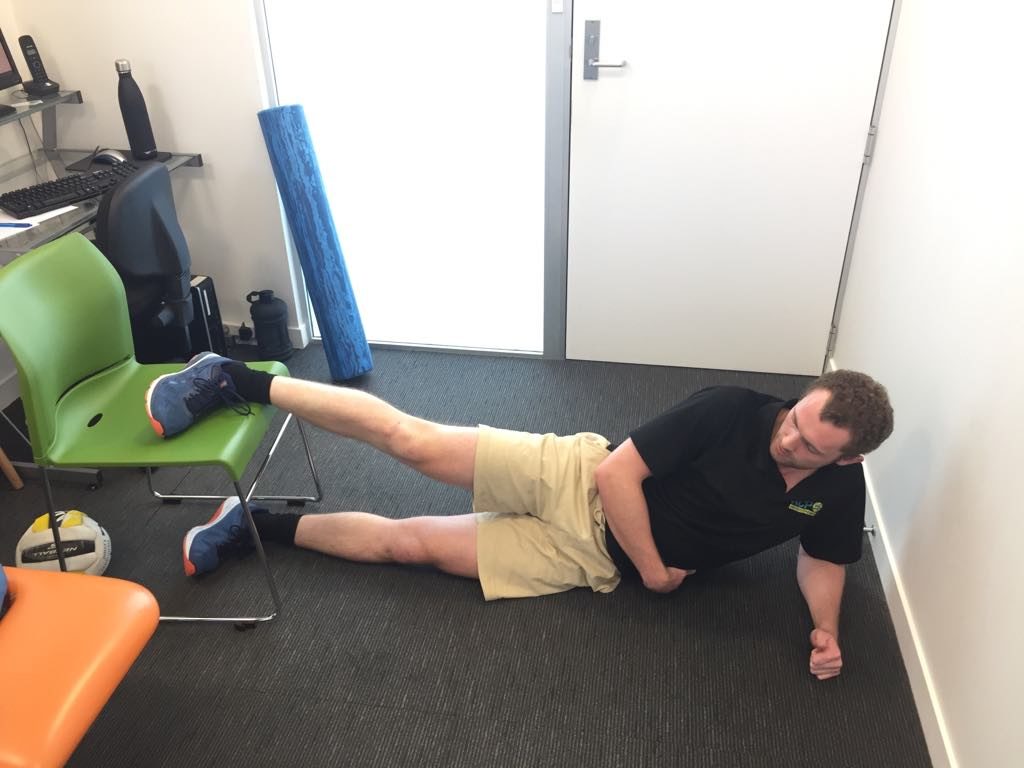
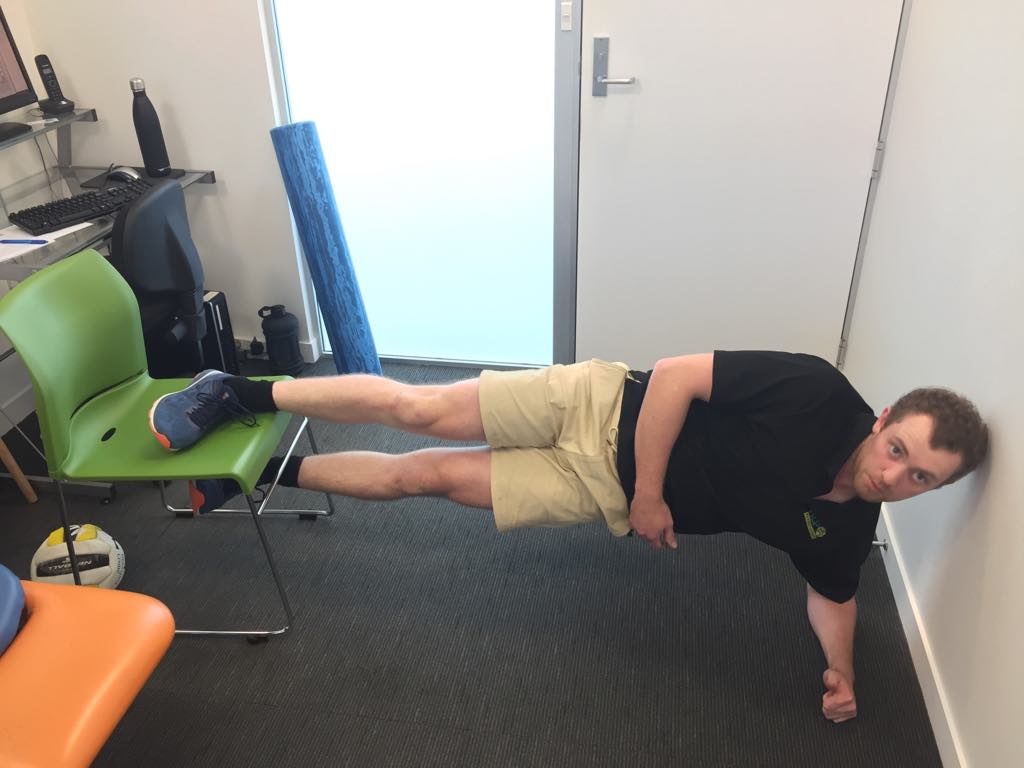
  • Lie on your side with the sore leg up on a bench/chair. Lift your bottom leg up making a side bridge and hold for 10 seconds. Repeat this 5 times, for 3 sets in total. This is the most difficult exercise of the ones mentioned.

I’m not going to profess that at 19 years old I was the perfect patient, I probably got the exercises done two or three times a week rather than every day like the sports doctor recommended. Had I done them more often I probably would have got back to my previous level of sport a bit earlier, but for me the process was around four months to feeling like I could play rugby (sprinting and kicking) freely and without pain.

So if you’ve got a current groin injury, give the Holmich Protocol a go! Even if you got injured a while ago, the exercise programme can still help with your pain and function.

Teej

Effect of Holmich protocol exercise therapy on long-standing adductor-related groin pain in athletes: an objective evaluation https://bmjopensem.bmj.com/content/4/1/e000343?int_source=trendmd&int_medium=trendmd&int_campaign=trendmd